
Tip of the Day 48: Viscosity Requires Ripeness
… a “ripe” process being one that you are done fiddling with.
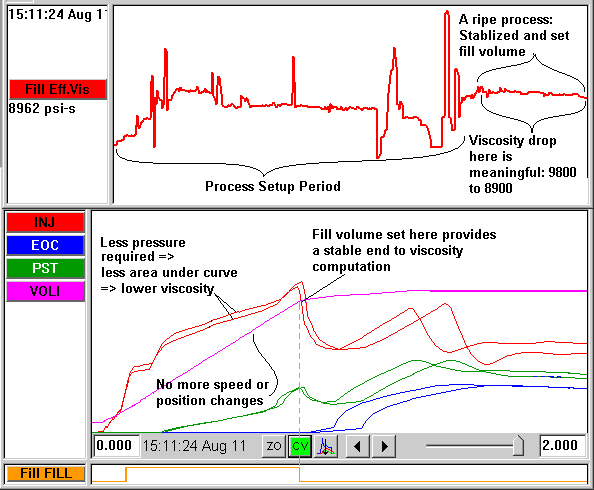
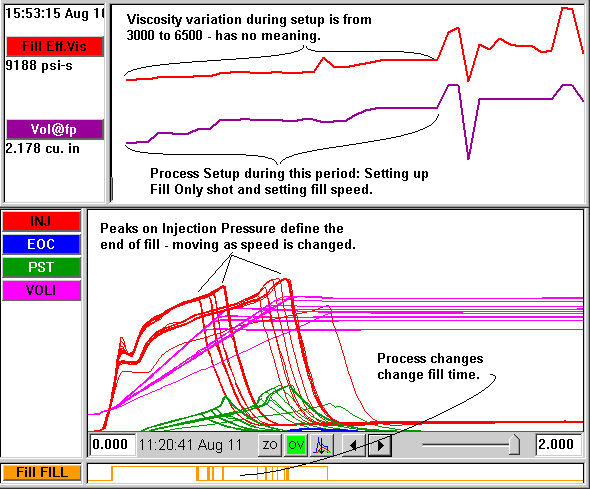
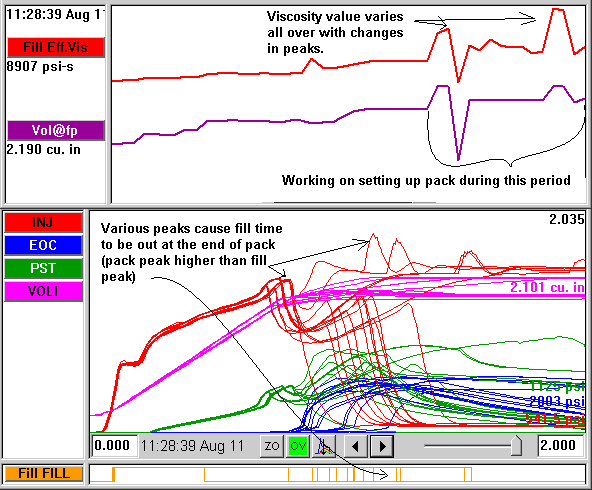
It appears that during process startup some people have been chasing the V1->V2 (in D3) or transfer position (D2) and trying to “Set Fill Volume” every time a change is made. The point here is that the process must be essentially finished or you need to be working on a rheology curve if the Effective Viscosity / Fill value is to have any meaning. Each time you adjust the process you are likely to change the end of filling position (or position of the injection pressure peak). Thus the viscosity number will “bounce” all over (see graphic below).
When you have set up a process:
- Finish the usual systematic steps: fill only, fill & pack, fill, pack and hold, screw speed etc.
- Run the process for several shots just as it will continue to run once you leave it – cycle time standard etc.
Now the process is ripe.
- Set the fill volume at the slow-down point (V1->V2 on a D3 process or transfer in D2).
- Monitor Effective Viscosity / Fill on the Summary Graph or on the Light Tree to look for any changes over the long haul.
Further Points:
- To get Effective Viscosity / Fill you must have at least injection pressure (or nozzle pressure). There is no other suitable way to know the work that the machine is putting into filling the mold.
Even though it is possible to get viscosity with just injection pressure…
Try very hard to get the LER-30 stroke sensor attached in order to get a good, stable velocity regardless of how the injection pressure peaks and levels occur.
Try to get at least the Screw Run sequence module input wired up to avoid having to set the zero on the stroke manually.
Process Setup: Working on Short Shots
Process Setup: Working on Pack
A “Ripe” Process: Stabilized and Fill Volume Set